
A busy, uncooperative Fall and Winter got in the way of putting miles on the Caterham. Either weekend weather was suboptimal, or other commitments trumped driving time. As a result, I'm still just getting to know the car, but initial impressions are mixed. There are some things it does well, but there are a few aspects of the Westfield I prefer. Some of these can be addressed with work, while others are things to which I will adjust or simply must learn to accept. I suspect rereading this post at the end of the summer will reveal some inner dissent on these initial opinions. Hopefully for the better.
Build decisions
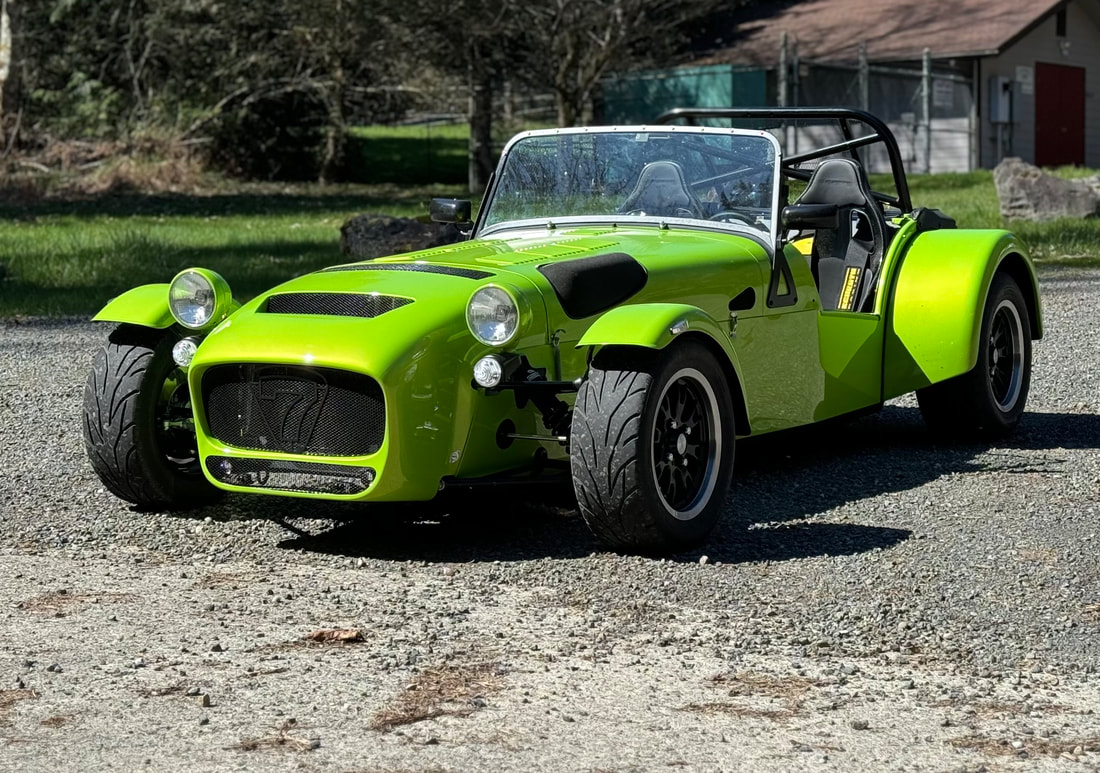
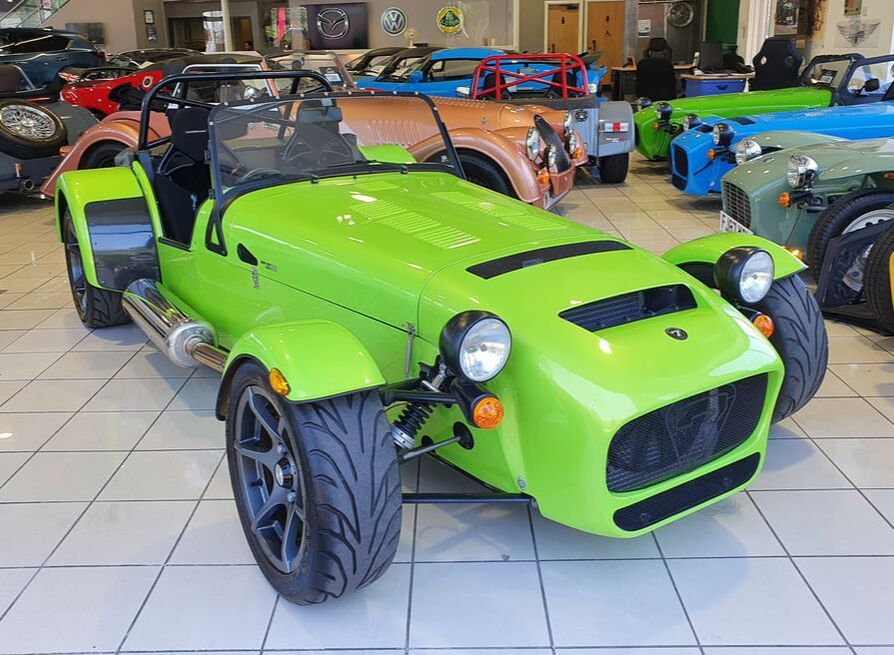
I'll begin with things I like. Thankfully, and without exception (thus far), I'm very pleased with the various design and practicality changes made during the build; I wouldn't do a single one differently. The dash and controls work and look great. Within the break-in-imposed limitations, the engine is fantastic. And thus far, all the 3D printed parts are holding up well. Until I drive another 420R SV back-to-back (coming this summer) I can't comment on the CORE dampers from an improvement perspective, but absent of a comparison, I have zero negative things to say about the damping. The exterior color is another positive. I agonized over this during the order phase given I had never seen Roulette Green in the flesh and online photos were very inconsistent. In person though, I love it. There is a pearl that adds a yellowish tone to the vertices of curves in certain lighting that really works and looks special. I suspect goldish tone wheels would be spectacular with this color.
Size
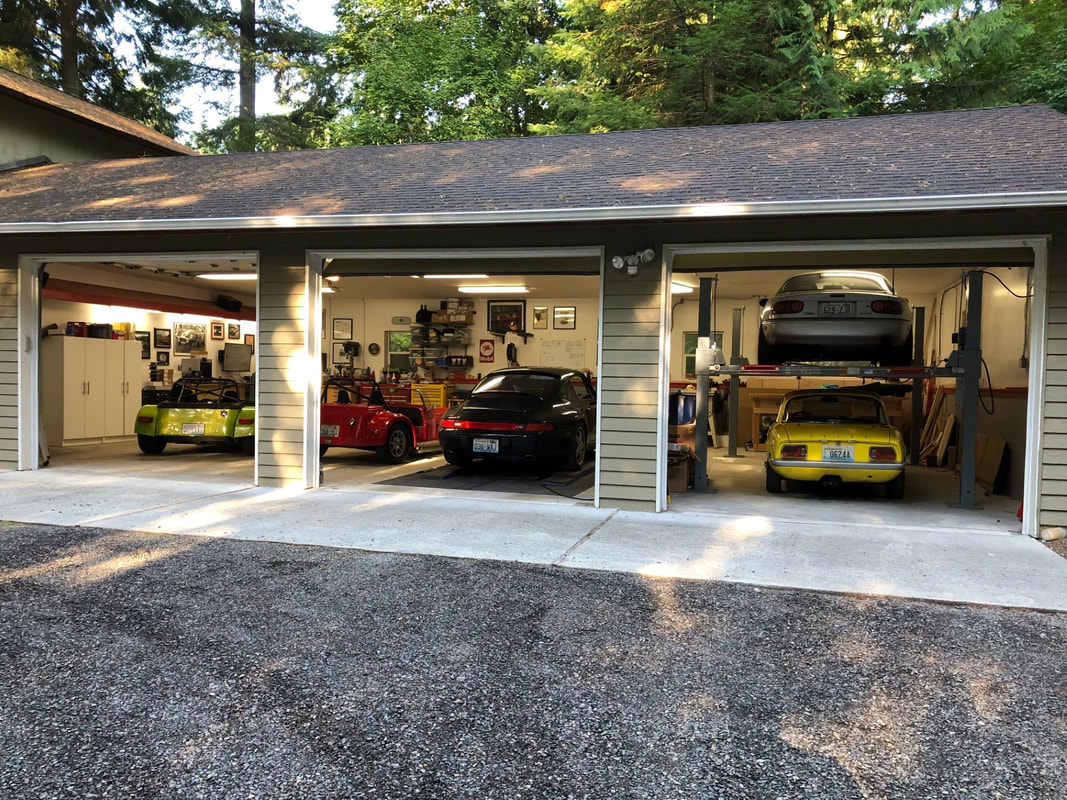
Although I haven't really explored the handling, at 7/10ths it feels great, if a little subdued. The Westfield rides more firmly, yet rolls more (no ARBs) but there is an eagerness to it that is missing in the Caterham. I think this is down to two things and my two biggest complaints with the car. First, it's too damn big. All other things being equal, I'm sure I'd be much prefer the smaller S3, but I'm convinced that the far more limited room under bonnet would have been too challenging given all my changes, and from experience, I know the lack of shoulder room with driving two-up makes it very uncomfortable for me. Bottom line, I think I would still be less than completely happy with the S3, but for different reasons.
In contrast, the Westfield is my Goldilocks for size. Shoulder and hip room are precisely midway between the S3 and the 4" wider SV, while the scuttle and windscreen are about the same width as the S3. It's wide enough not to feel crowded two-up, but the rest of it still feels small and cosseting. Add Caterham's center tunnel height into the mix, which interferes with my elbow when shifting, and it misses the mark for me. To be fair, my car has the lowered floors which drop the seat by 2 inches, exacerbating this problem, but the standard floors left me feeling sitting too high. Perhaps raising the seats by an inch will be a good compromise.
Steering
Second big dislike is steering speed. In my opinion, it is too slow for the chassis. A se7en is all about quickness and agility, yet the steering speed feels more appropriate for a heavier, less focused car. Interestingly, I initially had the same complaint about the Westfield, which was addressed with a quicker steering rack. Although that option exists for the S3, there is no such option for the SV. Why? I have no idea. This is something to which I simply need to adjust. On a related note, and also requiring acceptance, the turning circle is enormous. It makes it feel like you're maneuvering a far larger car, or -- gasp! -- an SUV. The steering feel however, is superb.
Boot
There are other nits. Sarting with the boot cover, it is less practical than necessary. The Westfield has a lockable boot cover with a reasonably large opening. In contrast, the Caterham cover attaches via snaps, and although the option exists to only unsnap the middle three to access the boot, the resulting opening is very short, thereby severely limiting what can be inserted or removed. That means unsnapping, then resnapping several more poppers to open the full cover; something I find cumbersome. Complaining about a seemingly daily-driver practicality issue may seem odd, but it's very common for me to stop off at the grocery store on the way back from a drive, or use the need for food as an excuse to take a drive, so it's something I frequently run into.
Seats
The seats are not quite as comfortable as the Mogs in the Westfield, and they are a bit wider, particularly in the ribs. As a result, they don't hold me in place as well when cornering and further remove me from feeling part of the car. Whether the comfort proves problematic will need to wait for a proper multi-hour drive; however, it is clear that I would have been very unhappy with the SV width carbon seats rather than my special-ordered S3 width versions.
Next step
Provided weather cooperates, I'm hoping to do a longer back-to-back drive with the cars in a couple of weeks. It should help me better identify how much of the above is attributable to lack of familiarity with the car and how much is genuine. Stay tuned...
Build decisions
I'll begin with things I like. Thankfully, and without exception (thus far), I'm very pleased with the various design and practicality changes made during the build; I wouldn't do a single one differently. The dash and controls work and look great. Within the break-in-imposed limitations, the engine is fantastic. And thus far, all the 3D printed parts are holding up well. Until I drive another 420R SV back-to-back (coming this summer) I can't comment on the CORE dampers from an improvement perspective, but absent of a comparison, I have zero negative things to say about the damping. The exterior color is another positive. I agonized over this during the order phase given I had never seen Roulette Green in the flesh and online photos were very inconsistent. In person though, I love it. There is a pearl that adds a yellowish tone to the vertices of curves in certain lighting that really works and looks special. I suspect goldish tone wheels would be spectacular with this color.
Size
Although I haven't really explored the handling, at 7/10ths it feels great, if a little subdued. The Westfield rides more firmly, yet rolls more (no ARBs) but there is an eagerness to it that is missing in the Caterham. I think this is down to two things and my two biggest complaints with the car. First, it's too damn big. All other things being equal, I'm sure I'd be much prefer the smaller S3, but I'm convinced that the far more limited room under bonnet would have been too challenging given all my changes, and from experience, I know the lack of shoulder room with driving two-up makes it very uncomfortable for me. Bottom line, I think I would still be less than completely happy with the S3, but for different reasons.
In contrast, the Westfield is my Goldilocks for size. Shoulder and hip room are precisely midway between the S3 and the 4" wider SV, while the scuttle and windscreen are about the same width as the S3. It's wide enough not to feel crowded two-up, but the rest of it still feels small and cosseting. Add Caterham's center tunnel height into the mix, which interferes with my elbow when shifting, and it misses the mark for me. To be fair, my car has the lowered floors which drop the seat by 2 inches, exacerbating this problem, but the standard floors left me feeling sitting too high. Perhaps raising the seats by an inch will be a good compromise.
Steering
Second big dislike is steering speed. In my opinion, it is too slow for the chassis. A se7en is all about quickness and agility, yet the steering speed feels more appropriate for a heavier, less focused car. Interestingly, I initially had the same complaint about the Westfield, which was addressed with a quicker steering rack. Although that option exists for the S3, there is no such option for the SV. Why? I have no idea. This is something to which I simply need to adjust. On a related note, and also requiring acceptance, the turning circle is enormous. It makes it feel like you're maneuvering a far larger car, or -- gasp! -- an SUV. The steering feel however, is superb.
Boot
There are other nits. Sarting with the boot cover, it is less practical than necessary. The Westfield has a lockable boot cover with a reasonably large opening. In contrast, the Caterham cover attaches via snaps, and although the option exists to only unsnap the middle three to access the boot, the resulting opening is very short, thereby severely limiting what can be inserted or removed. That means unsnapping, then resnapping several more poppers to open the full cover; something I find cumbersome. Complaining about a seemingly daily-driver practicality issue may seem odd, but it's very common for me to stop off at the grocery store on the way back from a drive, or use the need for food as an excuse to take a drive, so it's something I frequently run into.
Seats
The seats are not quite as comfortable as the Mogs in the Westfield, and they are a bit wider, particularly in the ribs. As a result, they don't hold me in place as well when cornering and further remove me from feeling part of the car. Whether the comfort proves problematic will need to wait for a proper multi-hour drive; however, it is clear that I would have been very unhappy with the SV width carbon seats rather than my special-ordered S3 width versions.
Next step
Provided weather cooperates, I'm hoping to do a longer back-to-back drive with the cars in a couple of weeks. It should help me better identify how much of the above is attributable to lack of familiarity with the car and how much is genuine. Stay tuned...


 RSS Feed
