Throttle Steer
  • Home
  • The Blog
  • Caterham
  • Elan
  • Elise
  • 993
  • Miata
  • Touring
  • The Ex's
  • Stuff

The Great Elan Wiring Harness Upgrade of 2025 is done!

8/16/2025

 
​Well, it's done. What started as a simple upgrade to more modern window motors, then degenerated into a new, modern loom, interior refresh, and repair of various things that either didn't work, or were repaired poorly by previous owners, has finally reached the finishing stage.  Eight long months after putting the car on the lift, it set tires on the ground and went for a short drive Thursday, before the rain set in that night. No issues. Nothing fell off, no Lucas smoke was released into the atmosphere, no concerning odors or sounds led me to pull over, and everything except the headlight pods appears to work. As part of the project, I rebuilt the headlight pod vacuum switch, but there was a real chance there was a leak elsewhere in the system. However, the engine would need to run to verify. Well, now that it's run, I can verify there is a leak, but that's a repair for next week. 

Provided I didn't screw up any crimps or solder joints destined for future failure, I'm pleased with the outcome. The 3D printed fuse/relay box turned out great as did the 3D printed glovebox behind which it sits. Even the interior flocking looks OEM. The carpet looks good, and upgrading the sound deadening to modern materials appears to have made a noticeable difference. Granted I am relying on memory given the time span between pre-project and post project drives, but road noise seems to have been subdued, providing a slightly more refined experience and creating a more prominent exhaust note. Despite adding the sound deadening (DEI Under Carpet Lite and strategically placed Dynamat Superlight) to places where the old sound deadening was missing, the weight increase was only one pound. The replacement heater valances are crack free, and the new center console is much higher quality that the outgoing piece. Rather than use the old — but period correct — vinyl center console pad with welded cross seams, I opted to use some leather left over from the Caterham build and sewed my own. Personally, I think the stitched accent lines look much better than the factory welded seams. The horn no longer has a mind of its own, and it's loud! 

Scroll through the annotated gallery for before and after photos as well as some of the custom work.

Elan rewire begins

4/10/2025

 
The great rewire project of 2025 is officially underway.  After nearly 11 weeks, the new wiring harness from AAW arrived.  While waiting, I pulled all the carpet, fixed a failed vacuum switch for the headlight pods, disassembled and refurbished the dash switches, refinished the nasty seat brackets, had the tach rebuilt and updated to work with the electronic ignition, figured out why the tach was blocked from mounting in the correct orientation rather than clocked by ~ 10 degrees, replaced the center console with one that is much higher quality, and started working out the plan for the incremental work I will tackle as part of this rewiring project.

First, in the unexpected scope creep category, the carpet needs to be replaced.  It was poorly cut and some cuts were made in a way that left big gaps which couldn't be filled by repositioning pieces.  The quality was also not great.  Because original-style loop carpeting is no longer available, a search has been ongoing for something close and cost effective.  After much internal debate, I've decided that it's better to buy a kit rather than source carpet and attempt to cut everything to shape myself.  This, however, does limit my options.  I am still waiting on one lagging carpet sample to arrive before deciding whose kit and which carpet to order. I may also redo the underlayment by strategically applying Dynamat Lite to quell some noise and potentially replace the felt underlayment with a more modern, lightweight material from DEI.  The stock fitment doesn't include insulation on top of the transmission tunnel behind the dash, or on the sides of the tunnel next to the seats.  I'm not sure why the former is excluded, but the latter is simply due to available space.  Thin Dynamat will fit perfectly in both places.  Click on a picture below to launch a captioned slide show.
​The AAW loom is overbuilt. Most of the wires are 12 or 14 gauge, with some as large as 10 and a few as "small" as 16 gauge.  Mounting the powerblock as supplied was problematic from an accessibility standpoint.  It's big and because the relays remove from the side and they point in opposite directions, finding a location that didn't intrude into the passenger space was a non-starter.  To address this, a new mount was designed and printed from PET-CF that points all fuses and relays forward and attaches to the firewall behind the glovebox.  I will fabricate a new glovebox dimensioned differently from stock and include a door at the back for access to the fuses and three of the relays.  The other six relays will be located immediately below the bottom of the glovebox.  Still easily accessible, but out of the way.
Next up is starting the actual rewiring process.  That sounds really simple.  Yeah, no problem at all...

3D printed logos

1/20/2025

 
I decided to try my hand at tracing a couple of car logos and printing them from PLA. My first attempts were the Caterham written logo that uses their custom font, and the Lotus logo using the font style and layout from the logo used until the early '70s. For scale, each letter in the Caterham logo is 4" tall (100mm) and spelled out is a bit under 50".  The Lotus logo is a little smaller, with the diameter of the C in the ACBC portion coming in at 6.5" and the letters a little over 3" tall (80mm). Each piece is attached to the wall with a non-hardening adhesive putty which makes it easy to make slight adjustments. Photos below include close ups of the finish. Next up, are attempts at the Porsche written logo and the Westfield starburst logo

Slippery-sloping with the Elan

1/8/2025

 
The electric windows in the Elan are notorious for their glacial-like pace. When I bought the car six years ago, the passenger side upheld that reputation, but the driver's side needed a helping hand to close. Rebuilding the pulley system on that side improved things, but like the passenger side, it was still slow. In the intervening years, both windows have regressed, with driver's side once again requiring assistance. This year, I decided to replace the old motors with modern units using the excellent conversion kit from ae_mike on LotusElan.net. The new GM motors are much smaller and even with the mounting brackets save over 1.6 lb. per door. That's good. The bad is they made virtually no difference to window operation. 
​Troubleshooting commenced which included alternately bypassing the ground and 12v+ in the harness with straight connections to the battery (the switches control motor direction by alternating which motor wire receives 12v+ and which connects to ground.) This showed that although the 12v+ wiring was definitely slowing things down, it was the ground wiring bringing things to a halt. Cleaning the three chassis grounding points made no difference. A look under the dash revealed a rat's nest of wires that didn't inspire confidence given the combination of changes made by previous owners and 57-year-old wire insulation. But as bad as that appeared, the wiring in the nose of the car was worse. Insulation was brittle from the age and heat, and repairs were made using nasty connectors.  Ugh.

Next, I began the tedious process of removing the dash to get better access to the wires and the back of the window switches. Checking resistance of the ground between the switch and motor showed about 3 ohms even after cleaning the connections. At this point, I realized rewiring the dash was the right long-term fix. Based on what I saw in the nose, that quickly devolved into a decision to rewire the entire car.
​This is where the slippery slope rears its expensive head. First is the wiring harness decision. Do I go with the replacement loom made by Autosparks in the UK, which is faithful to the factory loom, or do I go modern? The stock Elan only has 2 fuses for the entire car, the old school relays are spread around the car, and the wire is PVC coated: thick and subject to age and heat hardening. All these shortcomings remain with the Autosparks harness. Going modern would provide added protection in the form of multiple fuses, a single location for fuses and relays, and the option of using modern wire with thinner, lighter, more robust insulation. The downside is more opportunities for me to screw up the wiring (um, why do the hazards flash while braking with the wipers on??) and the onus is on me to create and document everything for future troubleshooting. Enter Advanced Auto Wire.  
​AAW has been doing upgraded looms for MGs and Triumphs for years. They now make one for the Elan. It's not perfect though. The fuse and relay box (AAW calls it the powerblock) is bulky at 7" x 7" x 2.75", and the harness doesn't have provisions for either the headlight flasher or the headlamp pod limit switches which prevent the headlights from turning on when the pods are retracted. However, neither of these are issues for me. I don't use flash to pass and the limit switches are frequently disabled by owners given they can be problematic. The benefits though seem significant. The loom should be much lighter and simpler than stock, it uses modern GXL wire in standard British/Lotus colors (except for replacing Brown with Yellow), there are twelve fuses, including four in the headlight circuit, X relays, and AAW provides excellent documentation including a color-coded wiring diagram. To top it off, support through the sales process was top notch. As a one-man shop, you are always dealing with the business owner, and Steve genuinely seems interested in customer satisfaction. The loom should be here in 8-10 weeks.

Synchronicity

4/2/2019

 
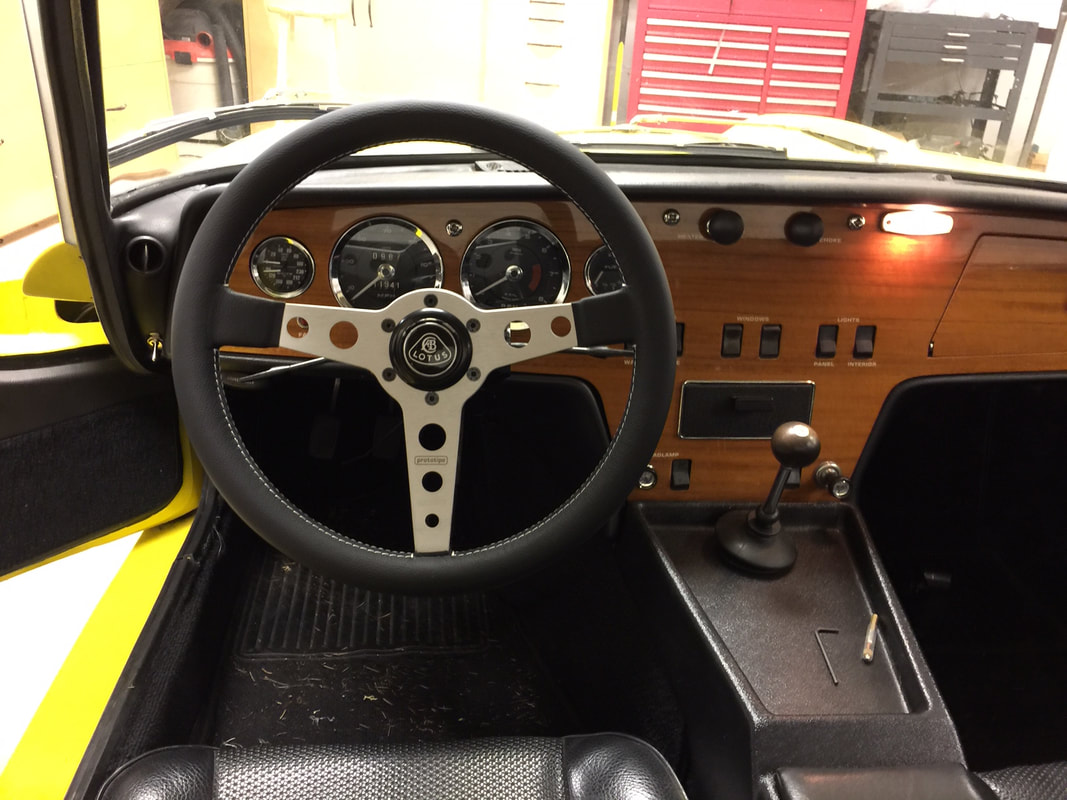
The Elan's previous owner had a shop rebuild the Strombergs as part of a laundry list of maintenance items.  I assumed they got the synchronization pretty close, but I was unable to confirm this with my Synchrometer due to space issues, so eventually ordered a Unisyn which is perfectly at home in the confines of an Elan engine bay.  Much to my surprise, not only weren't the carbs synchronized, but they were about as far out as possible.  At idle, the back carb was closed, leaving the front carb to feed all the cylinders thanks to the carb adapter cross over tube and siamesed ports.  To put things in perspective, things were so bad that covering the front carb with the Unisyn wide open (i.e. partial blockage) killed the engine immediately, while completely blocking the rear carb intake with my hand produced zero change to idle speed.

After getting the carbs correctly synched, the mixture was revisited and slightly richened.  The engine now runs even better.  I still wish there was more top end, but this thing is extremely torquey and belies the meager 1.6L displacement.  

A tale of modernization and incompetence

3/27/2019

 
​I know never to trust my memory when the stakes are high and I’m uncertain I’m correct; however, if the stakes don’t appear particularly precipitous and I feel reasonably certain I’m right, then what the hell – trust away!  Unfortunately what I learned during a recent upgrade to the Elan is that I don’t always fully comprehend the stakes.  Call it ignorance, call it inability to think things through, or just call it good old-fashioned stupidity.  Regardless, it nearly bit me when installing the 123 Ignition distributor. 
 
Previous owners had slowly converted the Elan’s Twin Cam to non-Federal spec.  The secondary throttle assembly was removed, a custom carb adapter replicating the non-Federal version was installed, the vacuum retard mechanism was disabled, the Strombergs were converted to adjustable needles (although strangely keeping the leaner Federal profile), and the exhaust manifold was replaced with a header from RD Enterprises.  The two items remaining were the distributor (specifically the advance curve) and the mixture needles.  The Federal engine uses a very, very conservative advance curve that ranges from 5-19 deg with max advance at 5000 rpm vs. the non-Federal curve's 9-33deg with max advance at 6500 rpm.  Further, the carbs had fixed mixture needles to prevent Joe Mechanic from messing with emissions, and those needles had a much leaner profile than used outside the US.
 
Options to correct the ignition advance included sending the distributor out for a recurve while keeping the Pertronix, converting to a 3D ignition system which would yield improvements to drivability and give great flexibility for future mods, or use a programmable distributor from 123 Ignition.  Their Tune+Bluetooth version includes a rev limiter, phone-based anti-theft system, vacuum advance, and customizable advance and MAP curves with up to 10 user adjustable points.  It’s not fully 3D, but one could argue it’s 3D-light, or perhaps just 2.5D.  Installation is also very easy as everything is contained within the distributor and requires just one additional ground wire compared to the Pertronix.  In contrast, the 3D system meant building a wiring harness, replacing the crank pulley with one that includes a trigger wheel (requiring radiator removal), mounting a crank sensor, finding a location for the ECU, EDIS (or a more expensive ECU that doesn’t require one), and the wasted spark coil pack.  Bottom line, it’s a PITA.  Given I was trying to avoid PITA, and I prefer keeping the engine bay aesthetics close to period correct, I opted for the 123 Ignition.
 
On the surface completing this work seemed pretty simple, but the project was plagued with issues ranging from parts delivery to my carelessness which nearly turned the Elan into a rolling candle.  First, the parts order.  We had a big snow storm in the area that delayed delivery of the distributor by a week.  Once it arrived, it was immediately apparent they included the wrong cap.  Rather than the Twin Cam required side entry version necessary for carb clearance, they supplied a top entry cap.  Fortunately the vendor was very responsive and sent out the correct cap the same day I contacted him, but two more snow storms added another week and a half to that delivery.  Once it did a arrive I began removing the old distributor and had the revelation that the original distributor cap uses a screw in style plug wire, versus the more common push on style as found on the 123 Ignition.  In other words, new plug wires were required to complete the installation.  Add another week and a half for Magnecor to make and ship the new set, and I had lost almost a month.
 
This is where the next set of issues arose.  The ones due to my impatience and stupidity.  First, I screwed up and attached the distributor’s ground wire to what I thought was a ground.  Actually it is a ground whenever the starter isn’t engaged (as in when I tested it with a voltmeter) but since that lug also served as the other side of the solenoid, it became hot when the solenoid closed to spin the starter.  As a result, the engine wouldn’t start until after releasing the key from the start position when the ground was reestablished.  Fortunately that fix was simple; find a constant ground.  With that corrected, the engine started and the first test drive ensued.  At this point I should mention that my plan was to program in the Federal ignition curve, then after installing the richer needles, program in the non-Federal curve.  Given most people advance the Federal distributor a few degrees, I bumped the initial curve by 3 deg, but it was still pretty retarded.  Although the engine seemingly ran fine, after about 3 miles, the cabin began to fill with smoke as I pulled away from a stop sign.  That did not inspire confidence, but it did inspire panic.  Turns out the header was getting extremely hot and burned a hole through the adjacent fiberglass footwell.  The cause?  More stupidity on my part.   The 123 Ignition instructions state to set #1 at TDC, then with the cap removed, rotate the distributor in the opposite direction of normal rotor rotation until a green LED on the face of the distributor just begins to light.  Easy.  Well, easy if you don’t rely on memory for the normal rotor rotation direction and that memory is wrong.  The result is that the distributor thought it was just entering the window when the rotor completes the circuit for a cylinder, when in fact it was just ending that window.  The result was a weak spark that allowed unburnt fuel to enter the header and ignite, thereby significantly increasing primary tube temperatures and burning the fiberglass just 5/8” away.  Oops.
 
With that solved (and a heat shield installed between the header and footwell), the engine ran normally albeit just a bit smoother.  Next up, swapping in the richer, 2BAR needles, and programming in the non-Federal curve retarded by 2 degrees to account for fuel quality.  This was a big improvement.  Power seemed a little better – nothing radical, but enough to be noticeable – and throttle response was significantly improved.  The two-step delivery upon hard throttle application that felt similar to a modern turbo, was gone.  It still isn’t razor sharp like DCOEs or an ITB setup on a fuel injected car, but it now feels normal and no longer calls attention to itself. 
 
Next up is enabling the vacuum advance functionality.  The plan is to get some miles on the engine without the vacuum advance to establish a baseline for drivability and fuel mileage, then hook it up to identify any improvements or setbacks. 

Putting miles on the Brits

1/12/2019

 
Since buying the Elan, my schedule and good weather have infrequently aligned, making it hard to put meaningful miles on the car.  It also means that the Westfield has seen very little action, as getting to know the Elan has taken precedence.  This weekend the weather was beautiful: sunny and unseasonable warm with temps knocking on the door of 60F.  Although the playoffs were on and yardwork beckoned, I managed to get in some miles under the guise of running important errands. 

After today, two things stand out: first, the Elan lives up to the hype.  It's a 50 year old car with a modern feeling suspension, however, the engine and brakes do show their age.  The Strombergs don't offer throttle response as crisp as a good fuel injection system (or Webers) and the unassisted brakes require some muscle to work, but they do have good feel, and the engine does make decent power.  The suspension though; brilliant.  Great steering feel, very good grip, and the car simply flows from corner to corner.

Second, the Westfield is a highly involving weapon.  There is no more apt way to describe its capabilities and attitude.  Turn in, braking, acceleration -- there is simply no delay to any input and the car begs to be steered with the throttle.  The fact that the car doesn't cosset you, that the seats and harnesses firmly lock you to the chassis, creates a sense of oneness that I haven't experienced elsewhere.  When the road turns twisty and the speeds rise, it truly feels like an extension of your body, delivering a very entertaining experience.


Elan handling improvements

12/23/2018

 
Picture
Tires are an issue for the Elan.  Factory fitment for the first 3 generations is 145/80-13 and thanks to the mild flares in the S4, this was upped to a heady 155/80-13.  Although wider tires will fit when narrower than stock springs are used like with my TTR suspension, classic Lotus tolerance issues means that what fits one car, may not work on another.  And when you go too wide for a particular car, a mid-corner bump will create significant body damage. 

Although wider sounds better, the reality is that only crappy All Season tires are generally available in Lotus sizes.  The exception it the Michelin XAS and XAS FF.  These are modern tires using the classic XAS tread and the FF designation means the substitution of a much stickier rubber compound.  How sticky?  Well, that's hard to say.  Michelin doesn't publish a tread wear rating and wouldn't answer my question on that topic or identify the other tires in their range using that compound, but rumor says it's their R-compound.  Based on reported wear rates from those using the tire, that sounds about right.

The downside to the XAS is weight.  They aren't particularly light and they require heavy tubes.  Compared to the tubeless, and very, very worn 165/70-13 Firestone M&S tires that came with my car, they are fully 4 lb heavier per corner.  That's a lot, but it's not something felt when driving except through slightly weightier steering at high speed (not a bad thing).  The ride is much better, and the handling is simply in a different league.  The car now grips.  A lot!  They are also far more progressive and deliver better steering feel.

I also replaced the stock 11/16" front anti-roll bar with a 60% stiffer, tubular version from Kelvedon.  It saves about 4 lb, and has reduced the body roll significantly.  It still rolls more than my other cars, but not enough to hamper transitions.

​Last on the list was replacing the Lotus 26R style steering wheel with a Momo Prototipo.  The 26R wheel is slightly smaller (13" vs. 13.75") which is preferred, but the rim was too skinny for my tastes, and I don't like a wheel without thumb padding on the spokes.  Aesthetically, I also prefer the look of drilled spokes to the 26R's slotted spokes.  

The handling experience is now pretty special.  Great steering feel and it dives for an apex in a similar fashion to the Westfield; Chapman was right about the benefits of adding lightness.

Adding more lightness

11/24/2018

 
Picture
The Elan arrived missing the factory jack, which is specific to the Elan.  Used examples seem to go for ~$700.  Since I don’t plan to show the car, spending that much on a jack seemed a waste.  Besides, the spare tire is almost 30 lb of dead weight.  Adding in the jack, and tools to remove the center lock wheel, that’s a lot of extra pounds to carry around in case I get a flat.  It seemed a better option to jettison all those items and take a page form modern cars and use an air compressor and tire sealant.  After a little research, I came across a very small and light compressor intended for Motorcycles, and Slime tire sealant designed for tube tires like the XAS FF.  Those two items weigh a combined 2.75 pounds!  Next was deciding how to stow those items.  With the spare tire out of the way, there was now a ton more room in the boot, but driving the car made it clear that the spare absorbed sound.  To solve both issues, closed cell foam was layered in the spare tire well and cut outs were made to tightly hold the compressor, Slime, and a tool roll (it’s a Lotus.  You need to drive with tools). 
​

Initial jobs on the Elan

10/21/2018

 
The Elan arrived with a few issues: dead driver’s side window, horn that honked on its own, and ½” of play in the steering.  The horn was an easy fix.  The contact plate that attaches to the base of the steering column had come loose and would complete the electrical connection when the mood struck.  Easy fix.

The window was harder, as it required disassembly of the mechanism and a complete rebuild.  It now works much better, but is still not optimal.  Connecting the battery directly to the window motor revealed that the mechanism in the door works great, meaning the problem lies in the wiring between the battery and the motor.  Searches on Elan.net reveal that the fix is larger gauge wire and relays.  That will happen (maybe) over the winter. 

The steering fix was easy but frustrating.  Rather than a U-joint connecting the steering column with the rack, Lotus used a device called a flexible coupling that mimics a U-joint's flexibility via rubber cones wrapped around connecting bolts that are fitted through oversized holes.  It works well until the rubber cones dry up and die.  I initially replaced it with a U-joint from Dave Bean Engineering, but that part was poorly made and only eliminated half the slack.  The much beefier U-joint from RD Enterprises was worth the additional $25 and has completely eliminated the slack.
<<Previous

    Categories

    All
    3D Printing
    993
    Caterham
    Elan
    Elise
    Miscellaneous
    Tools
    Westfield

    Archives

    September 2025
    August 2025
    June 2025
    May 2025
    April 2025
    January 2025
    September 2024
    August 2024
    May 2024
    September 2023
    December 2021
    June 2021
    November 2020
    October 2019
    April 2019
    March 2019
    January 2019
    December 2018
    November 2018
    October 2018
    September 2013
    June 2012
    May 2012
    March 2012
    February 2012
    January 2012
    October 2009
    March 2009
    November 2008
    October 2008

    RSS Feed

Powered by Create your own unique website with customizable templates.