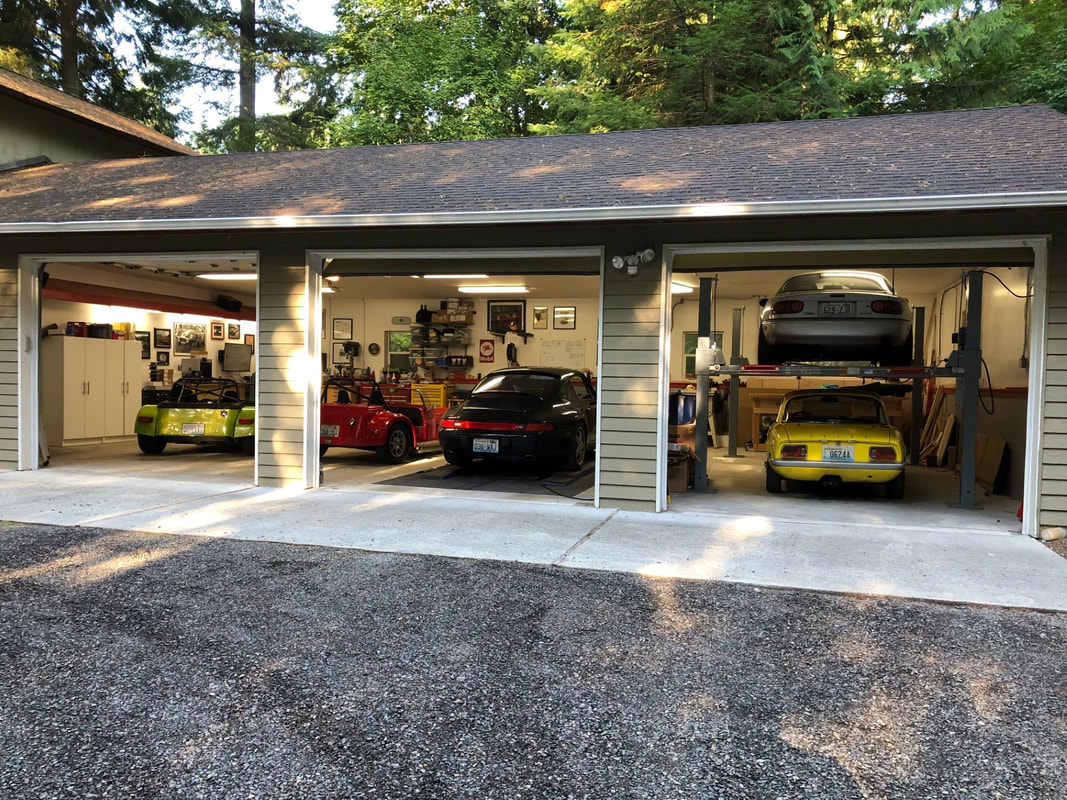
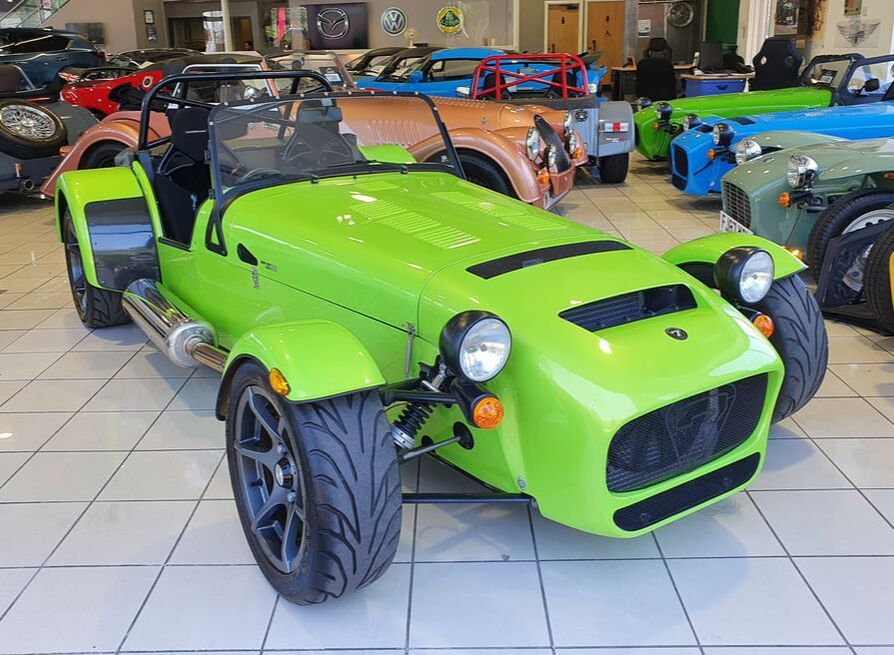
Since I am bored and can't do a lot over my break on this project, I decided to move a few things around the garage to see if I can make everything fit when the Caterham finally arrives. That comes in a crate the size of a car (obviously) which will need to stay in the garage for about a week. That means instead of the usual four cars in the shop, I will have the equivalent of six. A little juggling and...
What's that saying about the best laid plans of mice and men, or perhaps more accurately, the best laid plans of car projects and men? Since putting in the Caterham order in May, my plans have been to build the engine over my Christmas break. The head, cams and all the Raceline bits were ordered in mid July and the short block in early October. The Raceline bits save the all important cam chain tensioner arrived in time, the cams still have no ETA, so the head work can't be completed, and the short block which was on track at the end of November, still isn't here. At this point, the only part that I have no confidence in ever arriving are the cams. The backup plan is to order the RDL270 from Raceline. I'll call them on Monday to ensure they can supply them within a month, then call Esslinger. If they can't guarantee them (doubtful given the delays are at the cam grinder) then I'll make the change. Not optimal for a couple of reasons. First, I prefer an asymmetric setup given the flow differences between the intake and exhaust sides of the heads. And second, the Raceline cams are only available in the Kent blanks that use their own adjustable, but unmarked, cam gears, while I have a nice set of adjustable verniers that only fit the Ford OEM blanks. Oh well... Since I am bored and can't do a lot over my break on this project, I decided to move a few things around the garage to see if I can make everything fit when the Caterham finally arrives. That comes in a crate the size of a car (obviously) which will need to stay in the garage for about a week. That means instead of the usual four cars in the shop, I will have the equivalent of six. A little juggling and... ...there is plenty of room for the crate and Caterham in the space usually occupied by the Westfield and Elan. For reference, the width from the front of the cabinets to the ramp for the midrise lift under the 993 is nearly 21 feet. Once the crate is broken apart and ready for disposal, I'll put either the Elan or Westfield in its place and store the other car in front of the 993 (i.e. where the Westfield is in the photo above.) Something to be said about small cars...
The Caterham order is now locked with the factory and remains on track for a build date the week of 2/6. After further consideration, I've made a few small tweaks to the spec and build plan. These include:
Fortunately, the supply chain problems haven't had further impact (yet), as witnessed with the big pile of parts in my garage. After more than 20 years of Westfield ownership, I'm turning to the dark side; a deposit was placed last month on a new Caterham. The build slot is still pending given Caterham has yet to figure out their 2022 schedule, but it appears the kit won't arrive until sometime in the Spring. Although I love the Westfield and its recently completed 2.0L Duratec, that infamous engine build process showed me just how much I'm craving a big project. I'm also at a point where the window for me to undertake something like this is closing, so it's now or never.
After considering several options, it came down to either building another Westfield or trying my hand at a Caterham. My Westfield has a number of custom touches to better align the car with my tastes and preferences. After living with those mods for years, I wouldn't do any of them differently. This means building another Westfield -- while vastly cheaper -- would simply be a rehash of the previous build. Not much of a learning experience or challenge. With the Caterham, both the assembly process and things I wish to change from stock are new puzzles to solve. Unfortunately, Caterham won't sell a kit without a drivetrain, and my original workaround of buying a 360R or 420R and simply swapping engines with the Westfield turns out to be anything but simple or cheap. Packaging differences mean the Caterham's intake would need to be replaced with Jenveys or their equivalent, then a programmable ECU to accommodate that change, followed by an engine loom for the ECU, and several other minor items. Yes, I could avoid this slippery slope and take cheaper shortcuts, but the Westfield is a great car and I want to keep it that way for the next owner. Surprisingly, the alternative of keeping the Westfield as-is, selling the 420R crate engine, and building a new, more powerful 2.4L Duratec is only marginally more expensive. The upside from this approach is a better Westfield that needs no effort to prep for sale, a much faster Caterham, and I can spend all my build, design, and fabrication cycles on the new car rather than plotting to pull the soul from an old friend. I've gone with the SV which compares favorably to the Westfield in shoulder width. As for the engine, some may wonder why the 2.4L and not another hot 2.0L if I like my current engine so much? Short version: weight and expectations for dollars spent. When introduced, there was a reason the SV quickly earned the nickname Fat Bastard. With its extra weight, it would be a touch slower than the Westfield with the same engine. If I'm spending a lot money to change cars, I don't want to go slower. I want to go faster. Much faster. With that mindset, the 2.4L makes sense. Since Caterham won't sell me what I want, I've broken down the spec into two parts: what's on the Caterham order sheet and the planned mods. Some of this is subject to change given the months I have to evolve the plan. Order Sheet
Nearly 10 months to the day after pulling the engine, the Westfield was finally back on the road. A number of issues along the way conspired to drag this out much longer than anticipated, ranging from delays at the machine shop both starting and finishing, difficulty finding various parts, broken tools, failure to properly plan, and oh yeah, Covid-19. I opted to document the whole process in a 22 page and counting thread on USA7s.com. If you want to know the sordid details, go here. If you simply want the executive summary, read on.
This was an incredible learning experience. I opted to have the machine shop assemble the short block, and Steve Haniford (aka Progressive Automotive) refresh the head and re-profile the valves, while I took on the project management, assembly, and excessive swearing. The biggest surprise for me throughout the process was the realization that the Duratec really isn't intended to be rebuilt. It's not design aspects that are problematic, but rather the availability of seemingly innocuous little parts. Do you want high performance bearings in various sizes? Good luck. Need replacement dowel pins for the ones removed when decking the block? Don't ask Ford dealers for the part number. Need replacement part tolerances that align to the original to ensure after-market performance pieces still fit? Dream on. It's not so much that these things happened which dragged out the timeline, but rather the serial nature of their discovery. It became a biweekly ritual to identify the next minor blocker that required another part or tool order, and another 1-2 weeks lost waiting for said order to arrive, or the issue to be resolved with more labor. When it was finally time to start the car just long enough to confirm it would run, but not long enough to invoke the 20 minute cam break in procedure that required revs never fall below 2500rpm, the results were mixed. Yes it started, but it didn't quite seem to run on all four. Later, I discovered some bonehead (aka me) forgot to attach the grounding strap to the block. That fixed, the cam break in procedure and drive that followed went well, as did the remaining 500 break-in miles. The only issues were some oil leaks and the throttle return spring in the linkage jettisoning itself during the ring seating procedure (run to 5500 rpm under heavy throttle, then snap off the throttle, coast down in gear to 2500 rpm, and repeat 4 more times). Fortunately the springs on the Jenvey DTHTBs are strong enough to bring the idle back down to normal when the engine is hot, so just a minor inconvenience while I waited for the replacement assembly to arrive from the UK. The oil leaks were weird. After the initial start where it idled for less than 15 seconds, oil was leaking from the bolts on the right side of the sump and from the oil pressure warning light/gauge take off on the opposite side of the block. Miraculously the sump leak fixed itself during the first drive, but the other leak didn't respond to tightening and required removal of the T that attached the low pressure switch to correct. Dave Walker at Emerald adjusted my previous ignition map to ensure things would be safe(ish) with the much higher compression ratio until the car went on the dyno. Although drivability is great, it does mean power isn't optimized. Unfortunately du to COVID, getting on the dyno is proving an issue. It's unlikely that will happen until the Spring. The good news, is the engine runs very well. No idle, or drivability issues, and despite a tune that's only in the ballpark, it's fast. Yes, it's a little softer below 3000rpm (although adjustments to the ignition map may help here at part throttle), but it's smooth and pulls unapologetically to the current 8000rpm redline. The short video below shows full throttle in 1st and 2nd gears with a short burst into 3rd. Starting rpm was a little below 4000rpm, with shift points at 8000rpm, speeds are 50 mph and 76 mph respectively. (note: video quality is better if opened in YouTube here, rather than as embedded below)
As the reader of this blog (yes, I'm aware it's just me) will recall, I struggled with cam selection, ultimately opting for the Kent DTEC20. I'm pleased to say I have no regrets with this choice. As mentioned above, it is a little softer below 3000rpm, which was expected. If I was asked to quantify the loss, I would say it's just right; not so much that I lament the change, but not so little that I think I could have gone for a slightly more aggressive profile. Next on the upgrade list is to have a new exhaust manifold made. The current design is just about the limit for the current power levels, and has some questionable design decisions that are likely costing torque across the board, with the biggest limitations at high rpm. I'm also toying with either moving the injectors from the head to the throttle bodies, to help with atomization at high rpm, or switching to a dual injector setup to maintain better atomization at low speed thanks to the fuel hitting the back of the hot valve. That's probably (definitely?) overkill, so it has some appeal. More to come.
A failed oil pressure relief valve was the impetus for falling far down the slippery slope known as "while I'm in there." Given the Duratec's lack of a keyed crank which makes timing the cams a PITA with the engine in place (or out for that matter), any job that involves removing the front cover is best done with the engine removed. Since the engine was coming out to access the oil pump I thought it was a great opportunity to key the crank and address this shortcoming. Logic dictates that if the crank is coming out the bearings should be refreshed, and if bearings are being refreshed it would be foolish not to also upgrade the rods and pistons. Of course why upgrade the rods and pistons, if I don't take advantage of the increased valve clearance that change affords and install more aggressive cams with greater lift and raise the redline? If raising the redline is an objective, then the bottom end should really be balanced, right? Lastly, why go to that much trouble and not replace consumables that are easy to access now, but much harder later like seals, gaskets, water pump, and clutch slave cylinder? Like I said, slippery slope. Cam selection was a struggle. I'm not looking for big power and don't want a really soft bottom end, but those requirements seem to elicit suggestions for a 2.3L -- more torque than I want -- or assurances that radical cams capable of 290hp are "perfectly fine down low." The table below shows how the various options under consideration compare. Cams that were DTEC10 equivalents, and any cams intended for at least 260hp were ignored. Given how much better the intake side of the Duratec head flows, a symmetric setup intuitively seems like the wrong approach. Kent, however, has staunchly adhered to that philosophy while everyone else has not; SBD, Piper, Cosworth, Crane and even the stock Ford cams have less lift and/or duration on the exhaust side. Interestingly, Kent does time the two sides differently, but then again, the timing differs wildly for all of them. The DTEC35 gains it's advantage over the DTEC20 purely in overlap. Both setups have the least overlap and the most intake advance which are both good for low-mid range torque. The Piper has a lot more lift and duration on the intake side, and a lot less advance, but the exhaust has less lift than the Kent and just a bit more duration and advance. It also has a lot of overlap which means more potential idle and emission issues as well as more focus on the top end. The SBD has the most lift and duration on the intake side, ties for the most lift on the exhaust side, and has the most duration there as well. Overlap is in the middle, but leaning more towards the Piper. Intake Exhaust
After speaking with lots of people and studying the lift and overlap differences between the options, I decided on the Kent DTEC20. It's about the same step up from my current DTEC10s than those cams were to the stock Mondeo cams I ran for the first two years, which itself was a noticeable bump. And Kent was pretty blunt, telling me I would be unhappy with the bottom end of the DTEC35 as used in the R500. Although I question the symmetrical setup, they still seem the best option for my specific requirements. More to come...
The Elan's previous owner had a shop rebuild the Strombergs as part of a laundry list of maintenance items. I assumed they got the synchronization pretty close, but I was unable to confirm this with my Synchrometer due to space issues, so eventually ordered a Unisyn which is perfectly at home in the confines of an Elan engine bay. Much to my surprise, not only weren't the carbs synchronized, but they were about as far out as possible. At idle, the back carb was closed, leaving the front carb to feed all the cylinders thanks to the carb adapter cross over tube and siamesed ports. To put things in perspective, things were so bad that covering the front carb with the Unisyn wide open (i.e. partial blockage) killed the engine immediately, while completely blocking the rear carb intake with my hand produced zero change to idle speed.
After getting the carbs correctly synched, the mixture was revisited and slightly richened. The engine now runs even better. I still wish there was more top end, but this thing is extremely torquey and belies the meager 1.6L displacement. I know never to trust my memory when the stakes are high and I’m uncertain I’m correct; however, if the stakes don’t appear particularly precipitous and I feel reasonably certain I’m right, then what the hell – trust away! Unfortunately what I learned during a recent upgrade to the Elan is that I don’t always fully comprehend the stakes. Call it ignorance, call it inability to think things through, or just call it good old-fashioned stupidity. Regardless, it nearly bit me when installing the 123 Ignition distributor.
Previous owners had slowly converted the Elan’s Twin Cam to non-Federal spec. The secondary throttle assembly was removed, a custom carb adapter replicating the non-Federal version was installed, the vacuum retard mechanism was disabled, the Strombergs were converted to adjustable needles (although strangely keeping the leaner Federal profile), and the exhaust manifold was replaced with a header from RD Enterprises. The two items remaining were the distributor (specifically the advance curve) and the mixture needles. The Federal engine uses a very, very conservative advance curve that ranges from 5-19 deg with max advance at 5000 rpm vs. the non-Federal curve's 9-33deg with max advance at 6500 rpm. Further, the carbs had fixed mixture needles to prevent Joe Mechanic from messing with emissions, and those needles had a much leaner profile than used outside the US. Options to correct the ignition advance included sending the distributor out for a recurve while keeping the Pertronix, converting to a 3D ignition system which would yield improvements to drivability and give great flexibility for future mods, or use a programmable distributor from 123 Ignition. Their Tune+Bluetooth version includes a rev limiter, phone-based anti-theft system, vacuum advance, and customizable advance and MAP curves with up to 10 user adjustable points. It’s not fully 3D, but one could argue it’s 3D-light, or perhaps just 2.5D. Installation is also very easy as everything is contained within the distributor and requires just one additional ground wire compared to the Pertronix. In contrast, the 3D system meant building a wiring harness, replacing the crank pulley with one that includes a trigger wheel (requiring radiator removal), mounting a crank sensor, finding a location for the ECU, EDIS (or a more expensive ECU that doesn’t require one), and the wasted spark coil pack. Bottom line, it’s a PITA. Given I was trying to avoid PITA, and I prefer keeping the engine bay aesthetics close to period correct, I opted for the 123 Ignition. On the surface completing this work seemed pretty simple, but the project was plagued with issues ranging from parts delivery to my carelessness which nearly turned the Elan into a rolling candle. First, the parts order. We had a big snow storm in the area that delayed delivery of the distributor by a week. Once it arrived, it was immediately apparent they included the wrong cap. Rather than the Twin Cam required side entry version necessary for carb clearance, they supplied a top entry cap. Fortunately the vendor was very responsive and sent out the correct cap the same day I contacted him, but two more snow storms added another week and a half to that delivery. Once it did a arrive I began removing the old distributor and had the revelation that the original distributor cap uses a screw in style plug wire, versus the more common push on style as found on the 123 Ignition. In other words, new plug wires were required to complete the installation. Add another week and a half for Magnecor to make and ship the new set, and I had lost almost a month. This is where the next set of issues arose. The ones due to my impatience and stupidity. First, I screwed up and attached the distributor’s ground wire to what I thought was a ground. Actually it is a ground whenever the starter isn’t engaged (as in when I tested it with a voltmeter) but since that lug also served as the other side of the solenoid, it became hot when the solenoid closed to spin the starter. As a result, the engine wouldn’t start until after releasing the key from the start position when the ground was reestablished. Fortunately that fix was simple; find a constant ground. With that corrected, the engine started and the first test drive ensued. At this point I should mention that my plan was to program in the Federal ignition curve, then after installing the richer needles, program in the non-Federal curve. Given most people advance the Federal distributor a few degrees, I bumped the initial curve by 3 deg, but it was still pretty retarded. Although the engine seemingly ran fine, after about 3 miles, the cabin began to fill with smoke as I pulled away from a stop sign. That did not inspire confidence, but it did inspire panic. Turns out the header was getting extremely hot and burned a hole through the adjacent fiberglass footwell. The cause? More stupidity on my part. The 123 Ignition instructions state to set #1 at TDC, then with the cap removed, rotate the distributor in the opposite direction of normal rotor rotation until a green LED on the face of the distributor just begins to light. Easy. Well, easy if you don’t rely on memory for the normal rotor rotation direction and that memory is wrong. The result is that the distributor thought it was just entering the window when the rotor completes the circuit for a cylinder, when in fact it was just ending that window. The result was a weak spark that allowed unburnt fuel to enter the header and ignite, thereby significantly increasing primary tube temperatures and burning the fiberglass just 5/8” away. Oops. With that solved (and a heat shield installed between the header and footwell), the engine ran normally albeit just a bit smoother. Next up, swapping in the richer, 2BAR needles, and programming in the non-Federal curve retarded by 2 degrees to account for fuel quality. This was a big improvement. Power seemed a little better – nothing radical, but enough to be noticeable – and throttle response was significantly improved. The two-step delivery upon hard throttle application that felt similar to a modern turbo, was gone. It still isn’t razor sharp like DCOEs or an ITB setup on a fuel injected car, but it now feels normal and no longer calls attention to itself. Next up is enabling the vacuum advance functionality. The plan is to get some miles on the engine without the vacuum advance to establish a baseline for drivability and fuel mileage, then hook it up to identify any improvements or setbacks. Since buying the Elan, my schedule and good weather have infrequently aligned, making it hard to put meaningful miles on the car. It also means that the Westfield has seen very little action, as getting to know the Elan has taken precedence. This weekend the weather was beautiful: sunny and unseasonable warm with temps knocking on the door of 60F. Although the playoffs were on and yardwork beckoned, I managed to get in some miles under the guise of running important errands.
After today, two things stand out: first, the Elan lives up to the hype. It's a 50 year old car with a modern feeling suspension, however, the engine and brakes do show their age. The Strombergs don't offer throttle response as crisp as a good fuel injection system (or Webers) and the unassisted brakes require some muscle to work, but they do have good feel, and the engine does make decent power. The suspension though; brilliant. Great steering feel, very good grip, and the car simply flows from corner to corner. Second, the Westfield is a highly involving weapon. There is no more apt way to describe its capabilities and attitude. Turn in, braking, acceleration -- there is simply no delay to any input and the car begs to be steered with the throttle. The fact that the car doesn't cosset you, that the seats and harnesses firmly lock you to the chassis, creates a sense of oneness that I haven't experienced elsewhere. When the road turns twisty and the speeds rise, it truly feels like an extension of your body, delivering a very entertaining experience. I was digging through some old emails last night and came across messages I sent friends during the two tours I did in the Westfield that were wrapped around Monterey Car Week. I threw those together and updated the two photo pages from those tours with the story of each trip. Masochists can find the prose linked from the Tours page or via the direct links below.
Monterey or Bust 2010 Monterey of Bust - the Sequel (2012) ![]() Tires are an issue for the Elan. Factory fitment for the first 3 generations is 145/80-13 and thanks to the mild flares in the S4, this was upped to a heady 155/80-13. Although wider tires will fit when narrower than stock springs are used like with my TTR suspension, classic Lotus tolerance issues means that what fits one car, may not work on another. And when you go too wide for a particular car, a mid-corner bump will create significant body damage. Although wider sounds better, the reality is that only crappy All Season tires are generally available in Lotus sizes. The exception it the Michelin XAS and XAS FF. These are modern tires using the classic XAS tread and the FF designation means the substitution of a much stickier rubber compound. How sticky? Well, that's hard to say. Michelin doesn't publish a tread wear rating and wouldn't answer my question on that topic or identify the other tires in their range using that compound, but rumor says it's their R-compound. Based on reported wear rates from those using the tire, that sounds about right. The downside to the XAS is weight. They aren't particularly light and they require heavy tubes. Compared to the tubeless, and very, very worn 165/70-13 Firestone M&S tires that came with my car, they are fully 4 lb heavier per corner. That's a lot, but it's not something felt when driving except through slightly weightier steering at high speed (not a bad thing). The ride is much better, and the handling is simply in a different league. The car now grips. A lot! They are also far more progressive and deliver better steering feel. I also replaced the stock 11/16" front anti-roll bar with a 60% stiffer, tubular version from Kelvedon. It saves about 4 lb, and has reduced the body roll significantly. It still rolls more than my other cars, but not enough to hamper transitions. Last on the list was replacing the Lotus 26R style steering wheel with a Momo Prototipo. The 26R wheel is slightly smaller (13" vs. 13.75") which is preferred, but the rim was too skinny for my tastes, and I don't like a wheel without thumb padding on the spokes. Aesthetically, I also prefer the look of drilled spokes to the 26R's slotted spokes. The handling experience is now pretty special. Great steering feel and it dives for an apex in a similar fashion to the Westfield; Chapman was right about the benefits of adding lightness. |
Categories
All
Archives
December 2021
|