Throttle Steer
  • Home
  • The Blog
  • Westfield
  • Elan
  • 993
  • 944 turbo
  • Miata
  • The Ex's
  • Stuff

Engine Rebuild Complete

11/14/2020

 
Nearly 10 months to the day after pulling the engine, the Westfield was finally back on the road.  A number of issues along the way conspired to drag this out much longer than anticipated, ranging from delays at the machine shop both starting and finishing, difficulty finding various parts, broken tools, failure to properly plan, and oh yeah, Covid-19.  I opted to document the whole process in a 22 page and counting thread on USA7s.com.  If you want to know the sordid details, go here.  If you simply want the executive summary, read on.

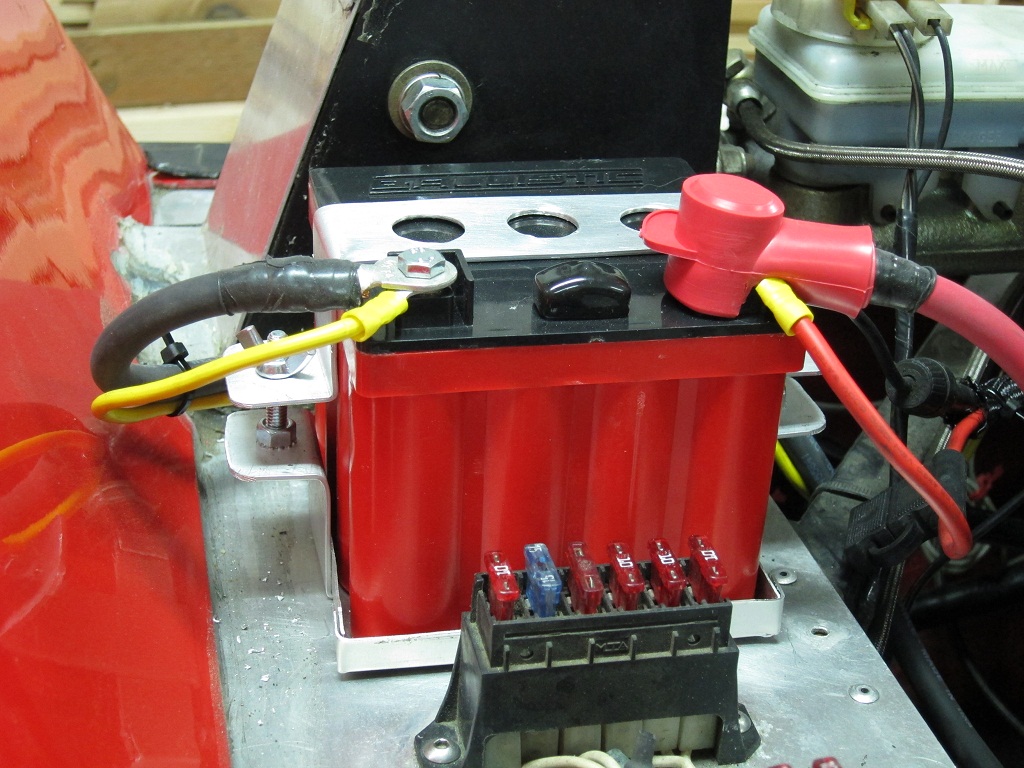
This was an incredible learning experience.  I opted to have the machine shop assemble the short block, and Steve Haniford (aka Progressive Automotive) refresh the head and re-profile the valves, while I took on the project management, assembly, and excessive swearing.  The biggest surprise for me throughout the process was the realization that the Duratec really isn't intended to be rebuilt.  It's not design aspects that are problematic, but rather the availability of seemingly innocuous little parts.  Do you want high performance bearings in various sizes?  Good luck.  Need replacement dowel pins for the ones removed when decking the block?  Don't ask Ford dealers for the part number.  Need replacement part tolerances that align to the original to ensure after-market performance pieces still fit?  Dream on. 

It's not so much that these things happened which dragged out the timeline, but rather the serial nature of their discovery.  It became a biweekly ritual to identify the next minor blocker that required another part or tool order, and another 1-2 weeks lost waiting for said order to arrive, or the issue to be resolved with more labor.   

When it was finally time to start the car just long enough to confirm it would run, but not long enough to invoke the 20 minute cam break in procedure that required revs never fall below 2500rpm, the results were mixed.  Yes it started, but it didn't quite seem to run on all four.   Later, I discovered some bonehead (aka me) forgot to attach the grounding strap to the block.  That fixed, the cam break in procedure and drive that followed went well, as did the remaining 500 break-in miles.  The only issues were some oil leaks and the throttle return spring in the linkage jettisoning itself during the ring seating procedure (run to 5500 rpm under heavy throttle, then snap off the throttle, coast down in gear to 2500 rpm, and repeat 4 more times).  Fortunately the springs on the Jenvey DTHTBs are strong enough to bring the idle back down to normal when the engine is hot, so just a minor inconvenience while I waited for the replacement assembly to arrive from the UK.  The oil leaks were weird.  After the initial start where it idled for less than 15 seconds, oil was leaking from the bolts on the right side of the sump and from the oil pressure warning light/gauge take off on the opposite side of the block.  Miraculously the sump leak fixed itself during the first drive, but the other leak didn't respond to tightening and required removal of the T that attached the low pressure switch to correct. 

Dave Walker at Emerald adjusted my previous ignition map to ensure things would be safe(ish) with the much higher compression ratio until the car went on the dyno. Although drivability is great, it does mean power isn't optimized.  Unfortunately du to COVID, getting on the dyno is proving an issue.  It's unlikely that will happen until the Spring.  The good news, is the engine runs very well.  No idle, or drivability issues, and despite a tune that's only in the ballpark, it's fast.  Yes, it's a little softer below 3000rpm (although adjustments to the ignition map may help here at part throttle), but it's smooth and pulls unapologetically to the current 8000rpm redline.  The  short video below shows full throttle in 1st and 2nd gears with a short burst into 3rd.  Starting rpm was a little below 4000rpm, with shift points at 8000rpm, speeds are 50 mph and 76 mph respectively. (note: video quality is better if opened in YouTube here, rather than as embedded below)
As the reader of this blog (yes, I'm aware it's just me) will recall, I struggled with cam selection, ultimately opting for the Kent  DTEC20.  I'm pleased to say I have no regrets with this choice.  As mentioned above, it is a little softer below 3000rpm, which was expected.  If I was asked to quantify the loss, I would say it's just right; not so much that I lament the change, but not so little that I think I could have gone for a slightly more aggressive profile.  Next on the upgrade list is to have a new exhaust manifold made.  The current design is just about the limit for the current power levels, and has some questionable design decisions that are likely costing torque across the board, with the biggest limitations at high rpm.  I'm also toying with either moving the injectors from the head to the throttle bodies, to help with atomization at high rpm, or switching to a dual injector setup to maintain better atomization at low speed thanks to the fuel hitting the back of the hot valve.  That's probably (definitely?) overkill, so it has some appeal.  More to come.

Westfield engine upgrades

10/10/2019

 
A failed oil pressure relief valve was the impetus for falling far down the slippery slope known as "while I'm in there."  Given the Duratec's lack of a keyed crank which makes timing the cams a PITA with the engine in place (or out for that matter), any job that involves removing the front cover is best done with the engine removed.  Since the engine was coming out to access the oil pump I thought it was a great opportunity to key the crank and address this shortcoming.  Logic dictates that if the crank is coming out the bearings should be refreshed, and if bearings are being refreshed it would be foolish not to also upgrade the rods and pistons.  Of course why upgrade the rods and pistons, if I don't take advantage of the increased valve clearance that change affords and install more aggressive cams with greater lift and raise the redline?  If raising the redline is an objective, then the bottom end should really be balanced, right?  Lastly, why go to that much trouble and not replace consumables that are easy to access now, but much harder later like seals, gaskets, water pump, and clutch slave cylinder?  Like I said, slippery slope.  

Cam selection was a struggle.  I'm not looking for big power and don't want a really soft bottom end, but those requirements seem to elicit suggestions for a 2.3L -- more torque than I want -- or assurances that radical cams capable of 290hp are "perfectly fine down low."  

​The table below shows how the various options under consideration compare. Cams that were DTEC10 equivalents, and any cams intended for at least 260hp were ignored.    Given how much better the intake side of the Duratec head flows, a symmetric setup intuitively seems like the wrong approach.  Kent, however, has staunchly adhered to that philosophy while everyone else has not; SBD, Piper, Cosworth, Crane and even the stock Ford cams have less lift and/or duration on the exhaust side.

Interestingly, Kent does time the two sides differently, but then again, the timing differs wildly for all of them.  The DTEC35 gains it's advantage over the DTEC20 purely in overlap.  Both setups have the least overlap and the most intake advance which are both good for low-mid range torque.  The Piper has a lot more lift and duration on the intake side, and a lot less advance, but the exhaust has less lift than the Kent and just a bit more duration and advance.  It also has a lot of overlap which means more potential idle and emission issues as well as more focus on the top end.  The SBD has the most lift and duration on the intake side, ties for the most lift on the exhaust side, and has the most duration there as well.  Overlap is in the middle, but leaning more towards the Piper.


                    Intake                                                          Exhaust
Value
 Cam Lift (mm)
Duration
​Full Lift at TDC
 
Cam Lift (mm)
Duration
Full Lift at BDC
Stock Mondeo
9.87
256
 
8.45
252
Kent DTEC10
10.46
260
110
 
10.46
260
105
Kent DTEC20
11.27
268
110
 
11.27
268
105
Kent DTEC35
11.30
280
108
 
11.30
280
106
Piper BP285
11.93
296
102
 
10.97
288
104
SBD DUR03
11.98
310
105
 
11.27
294
105
After speaking with lots of people and studying the lift and overlap differences between the options, I decided on the Kent DTEC20.  It's about the same step up from my current DTEC10s than those cams were to the stock Mondeo cams I ran for the first two years, which itself was a noticeable bump.  And Kent was pretty blunt, telling me I would be unhappy with the bottom end of the DTEC35 as used in the R500.  Although I question the symmetrical setup, they still seem the best option for my specific requirements.  More to come... ​

Putting miles on the Brits

1/12/2019

 
Since buying the Elan, my schedule and good weather have infrequently aligned, making it hard to put meaningful miles on the car.  It also means that the Westfield has seen very little action, as getting to know the Elan has taken precedence.  This weekend the weather was beautiful: sunny and unseasonable warm with temps knocking on the door of 60F.  Although the playoffs were on and yardwork beckoned, I managed to get in some miles under the guise of running important errands. 

After today, two things stand out: first, the Elan lives up to the hype.  It's a 50 year old car with a modern feeling suspension, however, the engine and brakes do show their age.  The Strombergs don't offer throttle response as crisp as a good fuel injection system (or Webers) and the unassisted brakes require some muscle to work, but they do have good feel, and the engine does make decent power.  The suspension though; brilliant.  Great steering feel, very good grip, and the car simply flows from corner to corner.

Second, the Westfield is a highly involving weapon.  There is no more apt way to describe its capabilities and attitude.  Turn in, braking, acceleration -- there is simply no delay to any input and the car begs to be steered with the throttle.  The fact that the car doesn't cosset you, that the seats and harnesses firmly lock you to the chassis, creates a sense of oneness that I haven't experienced elsewhere.  When the road turns twisty and the speeds rise, it truly feels like an extension of your body, delivering a very entertaining experience.


Old tour write-ups

1/9/2019

 
I was digging through some old emails last night and came across messages I sent friends during the two tours I did in the Westfield that were wrapped around Monterey Car Week.  I threw those together and updated the two photo pages from those tours with the story of each trip.  Masochists can find the prose linked from the Tours page or via the direct links below.

Monterey or Bust 2010
Monterey of Bust - the Sequel (2012)

The Case of the Missing Friction Washers

6/2/2012

 
Made a weird discovery today.  The front and rear friction washers that bookend the crank sprocket assembly on the Duratec are missing.  As a modern "dispose when done" engine, Ford/Mazda optimized for assembly line speed rather than rebuild ease, and opted to use clamping force to hold the crank pulley and sprockets in proper alignment, rather than a woodruff key.  These missing washers are paper thin, Porsche priced items ($20/ea) and apparenlty form a critical component of the clamping design.  

I don't recall replacing them when I did the cams in 2007.  I'm not sure if I
simply didn't know about them back then, or if I was told that they didn't  require replacement.  Now I suppose I could have simply screwed up and failed to  put the front washer on 5 years ago when attaching the crank pulley, but in order to get to the rear washer, you have to remove the oil pump sprocket and then slide it and the crank sprocket off the nose of the crank as a unit (there is virtually no slack on that chain even when the tensioner is removed).  I am absolutely positive I didn't touch the oil pump 5 years ago, and given there is no reason to remove the crank sprocket unless you're removing the crank  or replacing the rear washer, I can't imagine I would have taken it off, removed  the old washer, and then put it back together wihout a new one.  This tells me  that these washers were never on my engine.

As to why they were never there, I suppose it's down to the engine's
history.  It was purchased from Kansas Racing Products who manufactured  alloy racing blocks for Ford who in turn gave them sweetheart deals on excess engines. I was told these engines become available for a variety of  reasons: over production, pulled from the line for Quality Assurance testing, or  simply for the engineers to look at and measure. Because none of these engines  are considered “new” Ford can’t resell them as crate engines, so they are stuck with two options: destroy them or allow their “friends”  such as KRP to resell them at deep discounts to their own customer base.  When the engine arrived, the  coil pack mount was missing a corner, but other than that it looked brand new  and had never been fired.  Perhaps there was an issue with the washers on the  assembly line that was dioscovered after the engine was assembled, and it was  deemed cheaper to sell it (and possibly others) as an excess engine, rather than  repair it.

Between this and the cam bolt issue described below, I really dodged a
bullet.

Cam Timing & Valve Clearances

5/30/2012

 
I upgraded the cams in the Westfield in summer of 2007.  The resulting power increase was pretty profound, but over time it seemed less so. Yes, the car was still very quick, but it just didn’t seem to have quite the same level of urgency I remembered those first several months.  It also failed smog twice (2009 & 2011) after passing within a few months of cam installation, so I suspected that the power loss might be real, rather than a simple recalibration of my butt dyno.  Compression and leak down tests revealed no issues, so valve timing was the next logical culprit.  Given a check of valve clearances showed some were out of spec, and I had an oil leak that required a closer look, I decided to pull the engine to address.  

Now setting valve clearances on a Duratec is a complex affair thanks to their mechanical, non-adjustable design.  A small inverted bucket (i.e. tappet) sits over the valve spring and its base forms the fixed, mechanical interface between the top of the valve stem and the cam lobe. The buckets come in different thicknesses and are selected to achieve optimal valve clearance.  To adjust the clearance, you first need to measure it, then remove the bucket to get the base thickness measurement that is stamped to the inside (3.xxx mm), and then calculate the new thickness required to get the clearance within spec.  The buckets are available with base thicknesses that come in increments of ~.02 mm, so the final setting is never exact, but should be within the accepted range (0.09"-0.011"/0.09"-0.012" intake/exhaust).  Given that measuring and changing out these buckets requires cam removal, and by extension, resetting cam timing, this was also an opportunity to correct any discrepancies in this area.
 
After removing the crank pulley and front timing cover, I noticed that the adjustable cam gears weren’t where I left them in ‘07 – i.e. they had moved and with that movement, had altered the cam timing.  A quick check revealed that the specs were significantly out of whack.  Kent recommends exhaust timing is set to 110 deg before TDC, and the intake to 105 deg after TDC, yet measurements showed these were at 116 and 95 respectively.  Now to be fair, the timing was most likley altered when the front pulley was removed (it’s not keyed and instead relies on a friction fit), but the delta between the two settings cannot inadvertently change during that process, and it too showed a big discrepancy, so cam timing is indeed out.  

The good news is that I appear to have found the source of missing horsepower and increased emissions.  The bad news is that it reveals the torque wrench I originally used to torque the clamping bolts isn’t very accurate at the required 12 ft-lbs setting.  Suffice it to say I am buying a new torque wrench to handle all fastening duty under 20 ft-lbs, and investing in Loctite.

Squeak Fix Update

3/3/2012

 
The roads were dry today, so I finally had an opportunity to test the recent de-squeaking measures.  What an improvement!  Although there is still a minor squeak from the rear silencer mount to tackle, the car is transformed.  It's not just that it's quieter, but psychologically, the lack of squeaks and creaks adds a significant sense of rigidity to the chassis.  What I previously perceived as flex on bumpy roads was simply my gut response to the squeaking.

Eliminating Squeaks

2/26/2012

 
The Westfield has been a squeaking nightmare for a number of years, with two items accounting for the cacophony: worn out silicone bond between the scuttle and tub, and dry polyurethane bushings in the front suspension.  Although annoying, the noise is something I've learned to live with out of nothing more than sheer laziness.  The suspension job is a PITA due to my engine installation which blocks access to one suspension bolt, and the scuttle, although easy to remove, requires a lot of juggling with wires to get in position to clean the underside.  I hate wire juggling.

However, over the last couple of weekends, I've finally tackled the issues.  To ensure a long term fix for the scuttle-to-tub squeaking, rather than applying more silicone, the old stuff was completely removed and closed cell foam padding tape went in it's place.  Silicone was applied around the bolt holes on the side of the scuttle to ensure no moisture makes it's way in the frame rails, and a bead of silicone was applied to the front where the fit isn't as tight.  It took a while, but wasn't that difficult.  The poly bushings, however, were a different story. 

My engine installation conspires to make this a big job.  The alternator -- which is buried at the bottom of the drivers side and difficult to access -- gets in the way of removing a key suspension bolt, and adds a couple of hours of work and a few hundred expletives to the job.  That is annoying enough, but given that the bushing grease has a short life, it means this isn't so much a repair, as it is a regular maintenance item.  Fortunately I stumbled upon some grease designed for this application that people claim lasts for years, so I decided to give it a shot.  

As expected, the job was a pain, and like an idiot I made
things worse.  First, I damaged the rubber boot for one of the lower balljoints, and next I bunged the threads of the other when the tierod remover slipped.  The lower balljoints are from an Austin Maxi which was never imported, so they had to come from the UK.   But it's done.  Lots of rain means I've yet to give the car a proper road test, but pushing down firmly on the frame rail is now met with silence, which is a great sign.

EVO2 Battery Update

2/6/2012

 
Finally finished installing the EVO2 this week. The PC680 was located at the bottom of the engine bay directly underneath the brake & clutch master cylinders. Great for lowering the center of gravity, but lousy for access. Given
the EVO2 is so light, I moved it back up to the traditional placement on the shelf in front of the scuttle. 
Picture
This placement meant that a slightly longer 12V+cable was needed, so I decided to roll custom battery cables equipped with
terminals appropriately sized for the small M6 terminal used on the EVO2.  The good folks at Pegasus Auto Racing Supplies provided flexible 4 gauge cable, 1/4” ring terminals, and insulating boot, while an Amazon vendor sent a crimping tool capable of dealing with such heavy duty terminals.

The battery is definitely up to the task of starting the car in cold weather,  so the big question now is how long will it last. My fingers and other appendages remain firmly crossed.

Lots of Updates

1/22/2012

 
Yikes!This blog was last updated over 2 years ago!!  Okay, so I’ve been a
bit delinquent, but given my website statistics, I think I’m the only person
who’s noticed.  The past two years have been pretty uneventful car-wise, so I’ll just touch the highlights here in reverse chronological order.

Adding Even More Lightness
The Odyssey PC680 in the Westfield was beginning to die, and since Lithium batteries are coming down in price...I picked up a 16 cell Ballistic EVO2 battery through Amazon.  Before going through the installation hassles though (I plan to relocate it, so will need to mess with the cables and build a new battery tray/hold down setup) I wanted to test it in cold weather to make sure it is up to the task of how I use the car.  The other afternoon, with the temps in the mid 30's and falling, I rolled the Westfield out of the garage and let it sit on the driveway to acclimate to the colder outside temps. When checking back over 2-1/2 hours later, an infrared thermometer showed the battery had equalized with the current air temp at 31F and the block was a warmer, but still chilly, 37F.  Next it was time for the big test, so I inserted the key and turned...the engine fired right up! I immediately switched it off and then repeated that process two more times, and the result was three back-to-back startups around the freezing mark with zero issues.  Not too shabby for something that tipped my postal scale at
3lb 4.5oz! For comparison, the PC680 on the same scale came in at 14lb 10oz.

Stereo
I've been toying with putting a decent stereo in the 993 since buying it 5 years ago.  The cheap aftermarket head unit matched the interior, but wasn't a sonic masterpiece, while the factory speakers suffered from age related rot, so they...well, sucked.  Since Christmas is always a good time to spend wastefully, I picked up a new head unit locally (Kenwood Excelon KDC-x995), and then went to Rod Birch of Rennlist fame for speakers (Focal 165 V30) and amp (Arc Audio KS125.2 Mini).  The tweeters on these particular Focal's are small enough to fit in the factory tweeter housings with just a little persuasion from a Dremel, so other than the head unit, the system looks stock.  The amp is a class-H item which is really, really small and  light, and fits perfectly under the passenger seat.  It was a pretty big project
that took almost an entire weekend, but the results are impressive.

The Miata came with a poorly installed, tacky-looking silver head unit that was *really* out of place in the otherwise nice interior.  Given there’s now an innocuous-looking, black Clarion from the 993 sitting on the shelf, I made the swap.  It’s not a sonic improvement over the outgoing Sony XPLOD (no really, that’s the name Sony’s branding brain trust came up with after countless focus groups and hundreds of hours of market analysis), at least it looks a lot better.
Storage
I have always hated my tool cabinet.  It's too
small for my tool collection and the drawers slides aren't full extension, which is a poor design that always seems to hide the tool I’m trying to find.   I've read a lot of really positive comments about this tool cabinet on Garage Journal, so decided
to buy it while it was on sale for $350. 
Picture
It's very well made, has full extension, ball bearing drawer slides, and features 73% more drawer area than my outgoing cabinet, so I now have space for everything.

Speaking of  everything, the garage is also a little short on space for those
things, so I installed new, adjustable shelves over the tool cabinet.  (that’s the new shop dog, an 11 month old Great Pyrenees who doesn't like
to pose for photographs).
Let There be Lift
Although our garage has a pretty big footprint at nearly 20’x36’, the ceilings are just 8’ high.  This means a proper lift won’t fit.  Enter a BendPak MD6XP mid-rise lift.  It’s tall enough that I can work under the car in a seated position and limits the need for me to bend over when doing most jobs.  Simple ramps made from stacked 2x12s enable all the cars
to drive over the lift.
Picture
<<Previous

    Categories

    All
    993
    Caterham
    Elan
    Miscellaneous
    Tools
    Westfield

    Archives

    December 2021
    June 2021
    November 2020
    October 2019
    April 2019
    March 2019
    January 2019
    December 2018
    November 2018
    October 2018
    September 2013
    June 2012
    May 2012
    March 2012
    February 2012
    January 2012
    October 2009
    March 2009
    November 2008
    October 2008

    RSS Feed

Powered by Create your own unique website with customizable templates.